Mt. Moran, Direct South Buttress
By: Wayne Harney | Climbers: Wayne Harney, Shane Anglin |Trip Dates: July 22, 2000
Photo: Gary Clark
® The author(s) and naclassics.com | ![]() Back to climb page
Back to climb page ![]() NAC Home page
NAC Home page
|
|
Mt. Moran, Direct South Buttress By: Wayne Harney | Climbers: Wayne Harney, Shane Anglin |Trip Dates: July 22, 2000 |
|
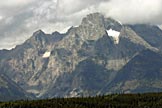
Photo: Gary Clark |
® The author(s) and naclassics.com | |
|
The canoe ride and short portage between the two lakes took about an hour and a half at a comfortable pace. There is no established trail in Leigh canyon, so we bushwhacked and boulder hopped for 3/4 of a mile up the bottom of the canyon to where the trees opened up and a good tent site presented itself. From here the South Buttress was just above us, so we could study the approach for the next morning. The climbing rangers at Jenny Lake warned us of bears in the canyon, as had a party camped at the edge of Leigh Lake, so we hung our food bag before going to sleep. 6:00am came early but we had a cloudless blue sky and were ready to finally get on the route. We took one pack with fleece, rain gear, and water, and carried our Tevas in the pack on the climb since any of the descent options takes you far from the route's base. At 8:30 we started simul-climbing the easy 4th class first two pitches. The third pitch was a wandering 5.7, which took some route finding. I got off-route and had to back down and climb a different crack. Finally I made it to the "long ledge" labeled on the topo. I was nervous about route finding on the rest of the climb knowing that we had to climb fast to finish the 11 pitches and the long descent. Luckily we stayed on route for the rest of the climb, but many pitches are not obvious and it would have been easy to get off route again and waste precious time. We traversed the 5.4 "long ledge" for the length of our 200' rope, then moved the belay a little further to the base of the next upward pitch. This saved a little time from doing two roped pitches across the ledge as shown on the topo. The next pitch was not at all obvious but I went up the nicest looking black rock in a concave area and ended up at the base of the "clean chimney". Looking down there was plenty of rope left so I continued up the chimney to its top, combining another 2 pitches and saving more time. (Bad rope drag though) Our progress was looking really good and we were only 2 pitches away from the pendulum pitch. We climbed up the left side of the white flake described on the topo to a big ledge near the edge of the buttress's arête. Shane then lead around the exposed arête and got off route a little but figured it out and climbed up a short chimney, then left, and then right across slabs and cracks to a small stance below the pendulum anchor. The pendulum and short aid crack were very casual and we made quick work of it. I was really beginning to wonder why this climb has a fearsome reputation. After only an easy (and exposed) 5.5 hand traverse the technical climbing was over. Or was it? It was 3:30, only 8 hours after we started. Plenty of daylight left for the descent. Ahh, enjoy the view, snap some photos, have a power bar… We had opted for the gully descent option west of the buttress so that we would only need 1 rope. (This was our first mistake) To get to the gully we had to go up before going down. The pendulum pitch and hand traverse deposited us in "the bowl" to the right of the ridge proper leading to Moran's summit. We had to climb exposed 4th class for a good hour to reach the sharp ridge, and then climb "the flat portion of the ridge". This is actually a miserable serrated knife edge with numerous small towers that leads to a notch where the descent gullies supposedly start. We reached A notch, was it THE notch? Well, there's a beaten trail down the left gully so that must be it, right? A quick 60' rap (also described in the guide) took us to this trail. We followed it 250' down the left gully and traversed into the right gully just as the guide said. Everything seemed cool. But wait, what's that 3rd gully even further to the right? The guide fails to mention that. Oh well, we're committed now.
Eight single-rope rappels later we were on the talus slope back to the canyon floor. Moral of the story… TAKE 2 ROPES AND RAPPEL THE SOUTH BUTTRESS RIGHT DESCENT ROUTE!!!!!! Our descent was truly an epic but the rotten slings and rusty pins in the gully suggested that we weren't the first to descend the loose chockstone 'gully of death'. We used up all our slings and a good cordalette on the rappels, one of which was off a single rusty pin. Rocks fell on us every time we pulled the rope. My new 200' rope got chopped in half on the last rappel. The Renny Jackson guide describes this gully as, "a miserable loose gully with huge chockstones and terrifying rappels into space." The third, "mystery" gully supposedly has no rappels. Since then I've talked to several parties who had done the standard South buttress right rappel with few problems. Do yourself a big favor, take two ropes and don't make our mistake. This climb had the best approach and worst descent I've ever done. The route had big wall exposure and nice moderate climbing. The pendulum and aid pitch was really cool. Definitely a Teton classic. |